Blind & Brush

How Much Does a Saddle Hunting Setup Cost?

A saddle is about a quarter of the bill. Here is the whole shopping list, part by part, at live prices — plus the three pieces beginners forget to budget for.

By Stephen V.Last updated How we pick

How this is funded:we earn a commission if you buy through our links, at no extra cost to you. It never changes which product we recommend, and we’ll tell you plainly when we’d skip one. Full disclosure.

The saddle is about a quarter of the bill — budget for six items, not one. A saddle setup is a system: the saddle itself, a platform to stand on, a climbing method such as sticks, a tether that holds you to the tree while you hunt, a bridge that connects the tether to the saddle, and a lineman’s belt or rope that keeps you attached while you climb and hang gear. Buy the saddle alone and you own a comfortable seat you cannot legally or safely use in a tree.

That is the single most expensive misunderstanding in this category, and it is the reason this page exists. Below is the whole shopping list with live prices, the cheapest credible route to a safe setup, and an honest account of what you can economize on and what you absolutely cannot. We do not publish our own price estimates — every number you see here is pulled live from the listing and stamped with the date it was read.

The six things you have to buy

  1. The saddle. Your seat and your harness in one. Mid-tier saddles from the specialist brands cover most hunters; the premium tier buys comfort refinement rather than safety. Compared in best tree saddles and, for the two flagship brands, in Tethrd vs Trophyline.
  2. A platform. The thing you stand on. This affects all-day comfort more than the saddle does, and an adjustable one that levels on a leaning tree is worth paying for.
  3. A climbing method. Usually three to four climbing sticks. Stick count drives both the cost and the pack weight more than brand does.
  4. A tether. The rope from the tree to your bridge that holds you while you hunt. Life-safety equipment. Buy new.
  5. A bridge. The short rope connecting the tether to the two attachment points on your saddle, and the thing you adjust to dial in comfort. Some saddles include one; many do not.
  6. A lineman’s belt or rope.Keeps you attached to the tree while you climb and hang the platform — the part of the hunt where falls actually happen. Also life-safety equipment.

Items 4, 5 and 6 are the ones beginners leave out of the budget, because the marketing photographs show the saddle. They are also the three you must not cut. A complete kit that includes all three is often cheaper than buying them separately, which is why the first pick below is a one-box system rather than a saddle.

The cheapest credible way into each part

The one-box route first, then the two parts people most often buy separately. Every price here comes from our live price layer — check the “as of” stamp under each button, because these numbers move.

Quick picks

Ranked on published specs, concealment fit and value. Select a row to jump to the full write-up. We have not field-tested this gear — here is exactly what we do instead.

#ProductBest forPrice
1
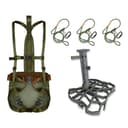
XOP Complete Tree Saddle Hunting System

XOP Complete Tree Saddle Hunting System

The easiest way into saddle hunting: a complete system in one box rather than a bare saddle you have to build a kit around. Harness, platform, carry bag and — the part beginners forget to budget for — the bridge, tether and lineman's belt all arrive matched, which removes the guesswork about what pairs with what.

Cheapest complete route
$228.57 · View on Amazon

$249.999% off

Price as of October 4, 2026. #ad How we’re funded

2
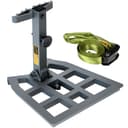
Tomaki Adjustable Aluminum Platform

Tomaki Adjustable Aluminum Platform

The budget entry into a real platform — light aluminum with an adjustable angle at a rock-bottom price. It's the cheap way to add solid footing to a saddle setup and find out whether you like standing versus a ring of steps.

Budget platform
$59.99 · View on Amazon

Price as of October 4, 2026. #ad How we’re funded

3
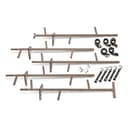
Guide Gear 20' Rapid Climbing Sticks

Guide Gear 20' Rapid Climbing Sticks

The budget entry point. Guide Gear's rapid sticks get you 20 feet up cheaply, which is the honest appeal — a low-cost way to try a mobile setup before committing to a premium system. Heavier and less refined, but they climb the tree.

Budget climbing method
$69.99 · View on Amazon

$79.9913% off

Price as of October 4, 2026. #ad How we’re funded

4
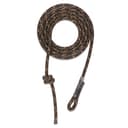
Ape Canyon Outfitters 9.5mm Tree Tether Rope

Ape Canyon Outfitters 9.5mm Tree Tether Rope

A burlier 9.5mm tether for hunters who want a thicker, confidence-inspiring rope to hang from. The extra diameter is easy on the hands and grips knots well — a solid pick if the ultralight ropes feel too thin for comfort.

Budget tether
$25.99 · View on Amazon

Price as of October 4, 2026. #ad How we’re funded

#1Cheapest complete routeTree saddle system

XOP Complete Tree Saddle Hunting System

The easiest way into saddle hunting: a complete system in one box rather than a bare saddle you have to build a kit around. Harness, platform, carry bag and — the part beginners forget to budget for — the bridge, tether and lineman's belt all arrive matched, which removes the guesswork about what pairs with what.

Strengths

  • Bridge, tether and lineman's belt are included, not sold separately
  • Hybrid harness doubles as a standard fall-arrest system
  • Edge platform is fully levelling, so a leaning tree isn't a problem

Trade-offs

  • Bundled parts may not be exactly what a veteran would choose
  • 9.6 lb as a full kit — heavier than a hand-picked ultralight setup
TypeComplete saddle system
IncludesMondo saddle harness + Edge platform + carry bag
Ropes includedBridge, tether and lineman's belt
Total weight9.6 lb
Rated capacityNot published

The spec that matters. For a first saddle setup, a matched kit beats a pile of separately-bought parts. The single most common beginner failure is a saddle, platform and tether that don't work well together — a complete system sidesteps that entirely.

Specs read from the product listing, on September 23, 2026. “Not published” means the maker does not state that figure.

#2Budget platformSaddle platform

Tomaki Adjustable Aluminum Platform

The budget entry into a real platform — light aluminum with an adjustable angle at a rock-bottom price. It's the cheap way to add solid footing to a saddle setup and find out whether you like standing versus a ring of steps.

Strengths

  • Lowest price for an aluminum platform
  • Adjustable angle for comfort
  • A cheap way to try platform-style saddle hunting

Trade-offs

  • Off-brand — inspect and respect the rating
  • Smaller and less refined than premium platforms
TypeAdjustable stand-on platform
MaterialAluminum
AngleAdjustable
WeightNot published
Rated capacityNot published

The spec that matters. A budget platform is a fine way to learn your saddle style before spending up — just inspect an off-brand stand-on carefully and never exceed the stated weight rating, since it's holding you off the ground.

Specs read from the product listing, on July 22, 2026. “Not published” means the maker does not state that figure.

#3Budget climbing methodClimbing sticks (20 ft)

Guide Gear 20' Rapid Climbing Sticks

The budget entry point. Guide Gear's rapid sticks get you 20 feet up cheaply, which is the honest appeal — a low-cost way to try a mobile setup before committing to a premium system. Heavier and less refined, but they climb the tree.

Strengths

  • Reaches 20 feet at a low price
  • Rapid attachment straps for a quick set
  • A cheap way to test mobile hunting

Trade-offs

  • Heavier steel-and-aluminum build than premium sticks
  • Straps and steps are noisier than specialist systems
Reach~20 feet
AttachmentRapid straps
CountNot published
WeightNot published
Rated capacityNot published

The spec that matters. Budget sticks are the right call for testing whether mobile hunting suits you before spending premium money. Just run them a few feet off the ground first to learn how they hang — cheap sticks reward practice more than expensive ones do.

Specs read from the product listing, on July 22, 2026. “Not published” means the maker does not state that figure.

#4Budget tetherSaddle tether rope

Ape Canyon Outfitters 9.5mm Tree Tether Rope

A burlier 9.5mm tether for hunters who want a thicker, confidence-inspiring rope to hang from. The extra diameter is easy on the hands and grips knots well — a solid pick if the ultralight ropes feel too thin for comfort.

Strengths

  • Thicker 9.5mm rope is easy to grip and hitch
  • Purpose-built for saddle tethering
  • Reassuring hand feel for newer saddle hunters

Trade-offs

  • Heavier and bulkier than ultralight tethers
  • Still a tether only — pair with a lineman's rope
TypeTree tether
Diameter9.5 mm
UseHang from tree (saddle)
RatedNot published
LengthNot published

The spec that matters. Rope diameter is a comfort-and-confidence choice, not a safety upgrade past the rating — a thicker tether is easier to hold and hitch, which matters when you're rigging cold-handed in the dark.

Specs read from the product listing, on July 22, 2026. “Not published” means the maker does not state that figure.

Three ways to buy, and what each one really costs you

The one-box route: a complete system

A complete system is the cheapest credible way to a safe, working setup, and for a first saddle it is what we would recommend to most people. The XOP system above arrives with the saddle harness, a fully levelling platform, a carry bag and — the part that matters — the bridge, tether and lineman’s belt included rather than sold separately. At a published 9.6 lb for the full kit it is heavier than a hand-picked ultralight setup, and a veteran would swap some parts out. Neither of those costs you a deer in your first season.

The hidden saving is compatibility. The most common beginner failure in this category is not buying the wrong saddle — it is buying a saddle, a platform and a tether that do not pair well, and then spending more money fixing it. More complete kits are compared in best saddle hunting kits.

The piece-by-piece route

Buying part by part costs more and gets you exactly what you want. It makes sense if you already know your preferences — or if you are upgrading one component at a time, which is how most hunters actually end up with a setup they love. The order that wastes the least money: platform first (it affects comfort more than the saddle does), then sticks, then the saddle, then the ropes. Our saddle picks, platform picks, stick picks and rope picks each cover one line of the shopping list, and Tethrd vs Trophyline covers the brand decision at the top end.

The mixed route most people end up on

In practice, most hunters buy a mid-tier saddle, a budget platform, a budget or mid-tier set of four sticks, and whatever ropes the saddle brand sells — then replace the platform and the sticks within two seasons once they know what annoys them. That is a reasonable path and not a failure of planning. Just do not let it start with the ropes, because that is where a false economy has real consequences.

Where to spend, and where not to

Spend on the platform. Comfort in a saddle comes from your feet as much as your seat, and a platform that levels properly on a leaning tree is the difference between a two-hour sit and an all-day one. This is the part hunters most often under-buy and most often replace first. What to look for is in how to choose a saddle platform.

Spend on the sticks you will actually carry.Sticks are usually the heaviest, bulkiest, loudest part of a mobile kit. Cheap sticks work, but they are noisier and heavier, and on a long walk-in that becomes the reason you stop going. How many you need — which changes the bill more than brand does — is worked out in how many climbing sticks you need.

Do not economize on the ropes, and never buy them used.A tether, bridge and lineman’s rope are life-safety equipment of unknown history the moment they are second-hand. Buy them new, from a brand that states what they are rated for, and retire them on the schedule the maker publishes. Our lineman’s rope picks and the rope versus belt comparison cover the choice; the prusik knot guide is the skill that makes them work.

Do not pay for comfort you have not earned yet.A premium saddle set up badly is less comfortable than a mid-tier saddle set up right, and bridge adjustment is a skill, not a purchase. Spend a few sessions three feet off the ground with whatever you buy — getting comfortable in a saddle is the free upgrade.

The costs that are not on the receipt

Practice time.Saddle hunting has a genuine learning curve, and the hunters who abandon it almost always skipped the ground-level practice. Budget two or three sessions before opening day to learn the climb, the platform hang, the bridge adjustment and — most importantly — the descent, which is where a disproportionate share of accidents happen.

The things you will want by year two.A bow holder or gear hook to keep your hands free during transitions is close to essential rather than optional — see the bow holder picks. Knee pads, a ring of steps or a set of aiders, and a better carry system all tend to follow. None of these are needed to hunt; all of them get bought eventually.

Whether it is the right spend at all.Worth asking honestly before you buy anything. A saddle setup is a real investment whose payoff is mobility — the ability to hunt a different tree every day, which mostly matters on public land or ground you do not control. If you hunt two prepared trees on a property you own, the same money in a ladder or hang-on stand buys more comfort and no learning curve. If your hunting is mostly field-edge and funnel work you have already e-scouted, a ground blind may out-hunt a saddle outright. The cheapest saddle setup is the one you do not need to buy.
Frequently asked questions

How much does a saddle hunting setup cost in total?

Budget for six items, not one: the saddle, a platform, climbing sticks, a tether, a bridge and a lineman's belt or rope. The saddle itself is typically only about a quarter of the bill. The cheapest credible route is a complete system in one box, which bundles the saddle, platform and all three ropes; the most expensive is a hand-picked premium saddle with premium sticks and a separately bought platform. All prices on this page are live — check the 'as of' date under each button.

What do you actually need to start saddle hunting?

Six things. A saddle (your seat and harness), a platform to stand on, a climbing method such as sticks, a tether connecting you to the tree while you hunt, a bridge connecting the tether to the saddle, and a lineman's belt or rope that keeps you attached while you climb and hang gear. Missing any of the last four means you either cannot hunt or cannot hunt safely. Nothing on that list is optional.

Is it cheaper to buy a saddle hunting kit or build your own?

A complete kit is usually cheaper and always simpler for a first setup, because it includes the bridge, tether and lineman's belt that cost real money when bought separately — and because the parts are known to work together. Building your own becomes worthwhile once you know your preferences well enough to pay more for a specific saddle or a lighter platform. The common beginner failure is a saddle, platform and tether bought separately that do not pair well.

What can you skip to save money on a saddle setup?

Nothing on the safety list — the tether, the bridge and the lineman's belt are the three that get cut and the three that must not be. What you can genuinely economize on is the saddle itself (a mid-tier saddle set up well beats a premium one set up badly), the platform (a budget adjustable aluminum platform does the same job as a premium one, heavier), and stick count (fewer sticks plus aiders, once you have practised). Buying used ropes or a used harness of unknown history is a false economy.

Do you need a harness if you have a saddle?

The saddle is your harness — it is a fall-arrest system you sit in, provided you are connected to the tree by a tether and a bridge, and by a lineman's belt while climbing. What you must not do is treat the saddle as a seat and climb unattached. The Tree Stand Safety Awareness Foundation cites a ten-state study in which 99 percent of fall victims were not attached to the tree. If you are hunting from a conventional hang-on or ladder stand rather than a saddle, you need a separate full-body harness.

Sources

Keep reading